
The June bank holiday weekend had plenty going for it this year – not least the sunshine – and Bord Bia Bloom celebrated its 20th year ...
Cookery Feature - The Joy of Food


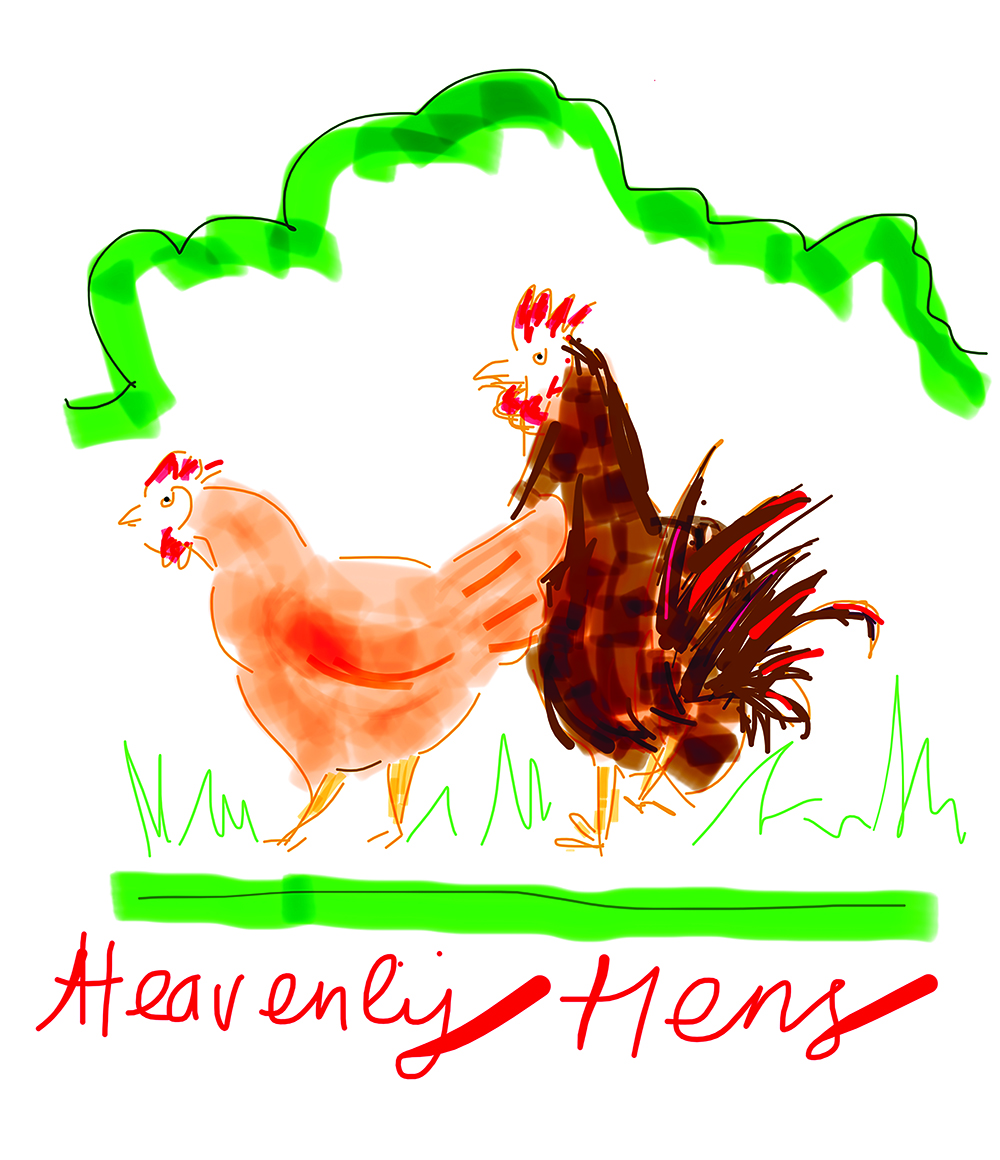
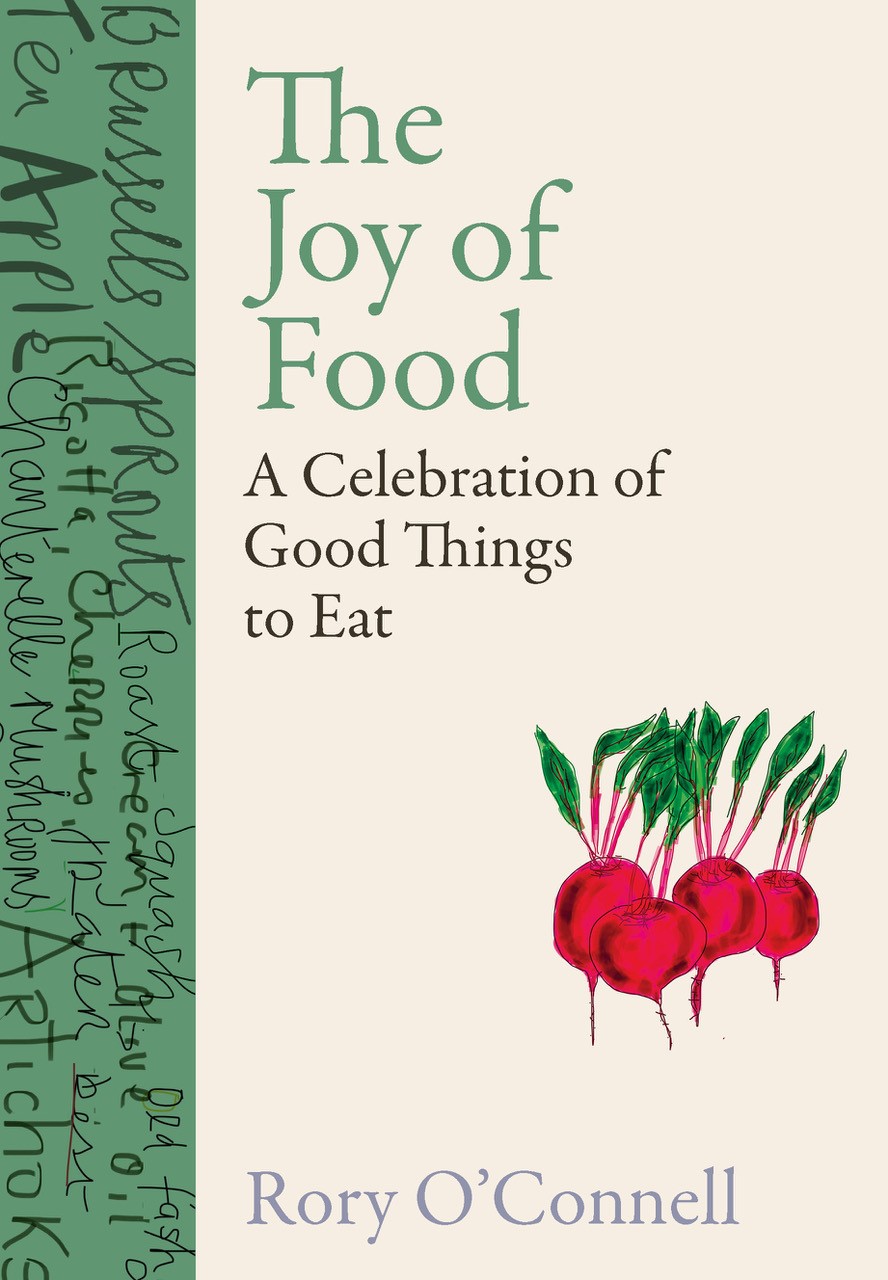 A simple statement on the back cover of The Joy of Food says, ‘This is the book that Rory O’Connell was born to write.’ And it is no overstatement. If ever there was a cookbook that expresses the author’s life philosophy, this is it. Multi-layered, with Rory’s own vibrant illustrations, and essays that are full of love and memories - Hazelnuts, A Bunch of Flowers for the Table, Heavenly Hens, Picnic - sprinkled through between the recipes, it’s not only a trusty kitchen guide but also a life-enhancing read.
Handsomely produced yet devoid of glossy instagram-perfect food photography, The Joy of Food is reminiscent of the great food books of an earlier era - by Elizabeth David, Jane Grigson (her classic ‘Good Things’ is very special to Rory) and, perhaps, a favourite of my own, Florence Irwin’s extraordinary Northern Irish gem ‘The Cookin’ Woman’ - that have inspired generations with evocative text lifted only by a few simple line drawings. A tonic for the imagination, such books engage the reader in a way that modern cookbooks rarely do and - like Rory O’Connell’s earlier books Master It (Irish Book Awards Cookbook of the Year 2013) and Cook Well, Eat Well (André Simon foodbook award 2017) - The Joy of Food is a confidence-inspiring teaching companion. Never taking shortcuts, the recipes are as long as they need to be and every dish is meticulously explained in detail, and in the context of seasonal foods that are made endlessly exciting by their ephemeral nature. Once again, in The Joy of Food, Rory’s USP as a teacher is the ability to make the reader feel that the master himself is in the kitchen with you, explaining and demonstrating each ingredient and each dish so that you feel a shared sense of accomplishment.
 There’s also a sense of mindfulness, which makes The Joy of Food an exceptionally rewarding companion for our time. The joy comes in many forms - including, of course, the joy of sharing - and there are small Zen-like joys that are uniquely memorable, like sounds in the kitchen: ‘the almost inaudible sound coming from a stockpot as the bubble gently break on the surface of the liquid’, or ’the noise bread makes as it cools’. And, while it’s always been all about the ingredients for Rory O’Connell, his love of the cooking process itself is almost tangible - sometimes he simply loses himself in the process of creating a dish, occasionally even in front of a class of students at the Ballymaloe Cookery School (which he co-founded with his sister, Darina Allen, in 1983) - and there’s a profound and keenly acknowledged thankfulness for having found a life in food.
This life in food goes back to growing up in Culahill, where his mother’s love of cooking and of seasonal ingredients was passed on to her family, several of whom went on to make their names in food-related careers. And, as well as teaching at Ballymaloe Cookery School, Rory worked for many years with Myrtle Allen, as head chef at Ballymaloe House, and in other famous kitchens including the River Café and Chez Nico in London and Alice Waters’s iconic Californian restaurant, Chez Panisse, all of which have left their mark.
Rory O’Connell is without question one of the giants of modern Irish food and, while he’s been recognised nationally and internationally by his peers and his students for decades, it’s astonishing that he only became a household name relatively recently, with the arrival of his avidly followed How To Cook Well programmes on RTE. We are fortunate that his wisdom is now being passed on to a wider audience - and, especially, to so many young people, who are inspired by his philosophy of good food and always hungry for more of his teaching.
The Joy of Food is not for time-starved cooks in search of short cut recipes - but it is a must for every true food lover’s kitchen bookshelf, or bedside table.
The Joy of Food: A Celebration of Good Things to Eat by Rory O’Connell is published by Gill Books, priced €24.99.
RECIPES - a tempting seasonal selection from The Joy of Food, complete with Rory O’Connell’s detailed recipe introductions. With many of us likely to have smaller gatherings than usual at Christmas this year, the pheasant dish is worth remembering as a possible alternative to a big turkey.
SALAD OF SHAVED FENNEL AND KUMQUAT WITH GOATS’ MILK GREEK-STYLE CHEESE
 This is a refreshing combination of ingredients that can be served on its own as a light starter or to accompany grilled meat or fish. It is particularly good with grilled chicken or roast chicken legs. It is vital to shave the fennel thinly, otherwise it may be a bit tough and difficult to eat. It is equally important to take care with the kumquats, as they, too, will be much more delicious when sliced almost paper thin. The flavour of a goats’ cheese works well, as its robust taste stands up to the forthright flavour of the other ingredients.
Calling what we used to call ‘feta’ a Greek-style cheese is rather cumbersome, but the use of the word ‘feta’ can now only be associated with a sheep’s milk cheese made in Greece, hence the longer title. I use one of Jane Murphy’s Ardsallagh goats’ cheeses from County Cork, which she calls a ‘Greek-style salad cheese’. I am certain a sheep’s milk cheese in the same style would be good here as well. I have on occasion eaten some of the leftover salad the following day, and though the texture of the fennel had softened somewhat, it was still good.
I like to serve the salad spread out on the plate rather than piled up, as I find the flavours work better that way.
Serves 4
• 1 fennel bulb, about 350g
• 70g kumquats
• 6 tablespoons extra virgin olive oil
• 2 tablespoons freshly squeezed lemon juice
• 1 teaspoon honey
• 1 level teaspoon fennel seeds, toasted and coarsely ground
• 60–80g goats’ milk feta cheese
• Sea salt and freshly ground black pepper
Remove any tired outer leaves from the fennel bulb and trim the tops if they are looking a little dry. Save any feathery fennel fronds and flowers for garnishing the dish.
Slice the fennel bulb about 2mm thick, either by hand or using a mandolin. You can slice the bulbs lengthways or sideways. I sometimes do a combination of both.
Cut the kumquats into 2mm-thick slices with a sharp knife and remove and discard any pips as you go. Add to the fennel. I like the kumquats sliced lengthways, but others will be amused by them cut into thin rounds. Removing the pips is a bit tedious but worth the effort.
Whisk the olive oil, lemon juice, honey and fennel seeds together. Season to taste with salt and pepper. Pour the dressing over the fennel and kumquats and mix gently but thoroughly with your fingers. Taste again to see if the seasoning is correct. Allow to sit at room temperature for up to 1 hour before serving.
Serve the salad in a single layer spread out on a large flat plate. Crumble the feta over the salad and garnish with fennel fronds and a few fennel flowers, if available. If I think the oil looks a little scant, I will drizzle a little extra over at the last minute.
CASSEROLE ROAST PHEASANT WITH JERUSALEM ARTICHOKES AND INDIAN SPICES
 I love a traditional roast pheasant with all the time-honoured trimmings, but this recipe, with the use of an Indian spice mixture, is a way to ring the changes with this bird. Pheasants are generally excellent value for money and this technique of casserole roasting produces a very juicy result and is my favoured method of cooking this bird, which when roasted can sometimes be a little dry.
The joy of this dish, apart from the flavours, is that when you remove the casserole from the oven the ingredients have produced a sauce created by the juices of both the pheasants and the artichokes, then all you have to do is carve the birds and bring it to the table.
Jerusalem artichokes, which curiously are a member of the sunflower family, are getting easier to find every year as they become better known and valued for their taste and as a wonderful food for the gut. Gardeners will know that they are utterly easy to grow – when you plant them once, you will have them for ever more, as they come back year after year. The knobbly tubers sometimes require peeling, which is definitely tedious, but in this recipe they just need careful scrubbing. The vegetable can be eaten raw or cooked and is extremely versatile. They make a silky soup and a lovely purée and are delicious when roasted to a rich colour or slowly braised in chicken stock. There are countless flavours that it will accept and in this book I also pair them with mussels and saffron in a soup.
The spice paste as listed will make twice what you need for this recipe, but I find it so useful that I make the full quantity and keep it in the fridge for up to a week or freeze it. I use it with other birds, such as chicken, quail and guinea fowl, and it makes a fantastic paste for roast chicken wings.
Serves 4–6
• 2 oven-ready pheasants
• 20g butter, at room temperature
• 650g Jerusalem artichokes, scrubbed and sliced in half lengthways
• 1 tablespoon chopped fresh coriander leaves
• Sea salt and freshly ground black pepper
• Spice paste
• 2 large garlic cloves, peeled and crushed to a paste
• Juice of 1 lemon
• 2 tablespoons extra virgin olive oil
• 1 tablespoon lightly roasted and finely ground cumin seeds
• 1 tablespoon sweet paprika
• 1 tablespoon ground turmeric
• 1 level teaspoon cayenne pepper
• 1 teaspoon caster sugar
• 1 teaspoon salt
• 1 teaspoon freshly ground black pepper
Preheat the oven to 180°C.
Mix all the ingredients for the spice paste together and reserve.
Heat a heavy-based casserole large enough for the two birds on a gentle heat until quite hot. Dry the skin of the birds, then smear the butter over the breasts and legs and place them breast side down in the heated casserole. The breasts should sizzle on contact with the casserole – if they don’t, remove and allow the casserole to become hotter. Equally, however, you don’t want to burn the birds, so make sure your heat is not too high. Allow the breasts to become a golden brown colour, then remove the birds from the casserole and turn off the heat. Do not wash out the casserole at this point unless it has overheated while browning the birds.
Place half of the artichokes in the casserole and season with salt and pepper. Smear half of the spice paste over the breasts and legs of the birds and also a little into the cavity, then return the birds to the casserole. Reserve the rest of the spice paste for another use. It will keep covered in the fridge for a week or it freezes well. Place the remaining artichokes around the birds, season and cover with a tight-fitting lid.
Place the casserole in the preheated oven and cook for 1 hour 15 minutes. Test to see if the birds are cooked by checking to see if the juices run clear between the thigh and the breast. I loosen the leg a little and push in a teaspoon to collect some of the juices so that I can accurately judge the colour. If the juices are a little pink, I usually pop the covered casserole back into the oven for another 10 minutes and test again.
The dish is now finished and ready to serve with the tender artichokes and delicious cooking juices as the sauce. If you wish you can spoon off the small amount of fatty juices from the surface of the sauce, but I often leave them in.
Carve the birds onto hot plates or a serving dish. Surround with the artichokes and pour over the bubbling hot juices and a sprinkle of chopped coriander. I love to serve simple boiled green cabbage or curly kale with this dish. York is a wonderful variety of winter cabbage.
BRAMLEY APPLES BAKED WITH CHOCOLATE, HAZELNUTS AND SULTANAS
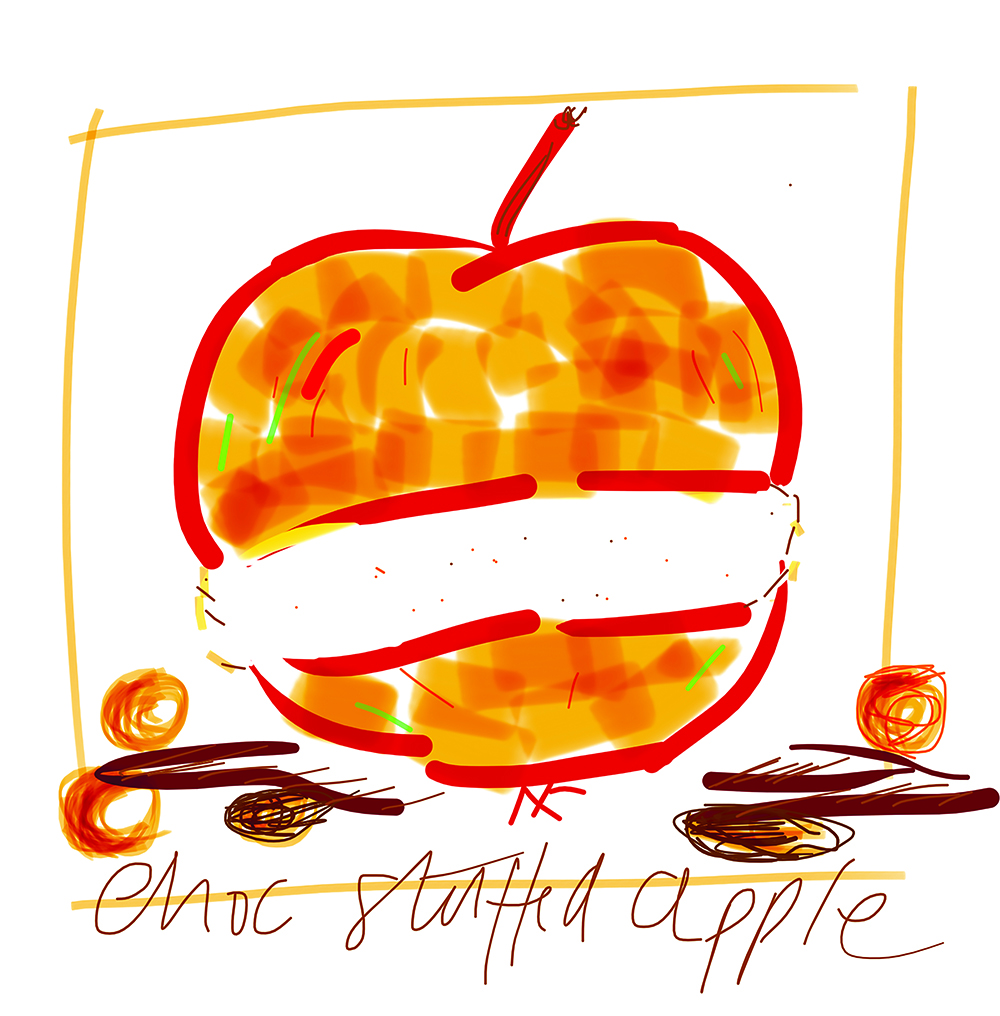 Gosh, how times have changed. When we were growing up, we were occasionally allowed to bring a Bramley apple in from the orchard, slice it thinly and dip the cold pieces in granulated white sugar before eating it. Mind you, my mother did keep an eye on us to make sure we did not eat too many of these wincingly bittersweet treats, as she knew – and indeed, we knew – that too many slices could definitely lead to ‘a pain in my tummy’. I vividly remember the crunchy texture of the sugar and the almost lemony tang of the bitter apple. It was without doubt what would nowadays be called a taste sensation. I wonder how many children taste such a thing these days – not too many, I suspect, in a world full of terrifying and mixed messages about food. We must not forget the joy of food, the joy of remembered moments around the table, the joy of sharing and of memories made.
There is something rather lovely about a baked apple though. They have a retro appeal, certainly, but much more importantly, when properly cooked at the correct time of the year, they are a joy. The best time as far as I am concerned is when the apples are either still on the trees or shortly afterwards. When they are fresh off the tree, they are full of juice and this yields the fluffiest and lightest baked apple. The apple I always bake is the crimson variety of the Bramley, which has the most delicate pink hue to the steaming froth within.
The timing of a baked apple is all-important. The flesh of the cooked apple needs to be cooked through and almost like froth, and at the same time the apple should look as plump as a pigeon at harvest time. An overcooked baked apple is a sad, shrivelled and dishevelled sight. I am still as amused by the pale marshmallow-pink midriff of the cooked apple just beginning to ooze out of the stretched and shrinking skin as I was when I watched them coming out of the oven at home as a child.
By the time these apples are cooked, the chocolate will have melted into a sauce that combines beautifully with the juices in the bottom of the roasting dish, with the sultanas and hazelnuts adding further texture and flavour. I like cold softly whipped cream with the hot apples, which I serve on hot plates. Others will perhaps like thin custard.
Serves 4
• 4 Bramley apples
• 6–8 teaspoons Barbados soft dark brown sugar
• 40g chocolate (54% cocoa solids), chopped into small pieces
• 30g butter, diced
• 50g hazelnuts
• 30g sultanas or raisins
• 200ml apple juice
• To serve
• Chilled softly whipped cream
Preheat the oven to 180°C.
Using an apple corer, punch a hole right down though the core of each apple. If the hole looks a little narrow, I sometimes punch a second hole to make plenty of room for the filling. Now you need to score an incision about 1mm deep all around the belly of the apple. This allows the skin to shrink during cooking and prevents the apple from bursting.
Place the apples in an ovenproof baking dish. The apples should be snug but not touching each other.
Start filling each apple with 1 teaspoon of sugar followed by some chocolate, then some butter, hazelnuts and sultanas. Use a little force, such as your thumb, to press the ingredients into the opening, pushing in as much as you can. Scatter all the chocolate, hazelnuts and sultanas that won't fit in the hollowed apples around the apples in the dish. Top each stuffed apple with the remaining sugar and pour the apple juice over and around the apples.
Cover the dish with a piece of dampened non-stick baking paper. Bake in the preheated oven for about 30 minutes, until the apples are completely tender but still holding their shape.
Serve the apples as soon as possible on hot plates and spoon over the juices, fruit and nuts from the baking dish. Chilled softly whipped cream is the perfect accompaniment.
By same author
-
Cookery & Artisan Foods - Inspired by BLOOM
Cookery & Food Tourism Feature - Waterford ...
Now well established as a major player in Irish food and tourism, Waterford was blessed with fine weather recently for the 17th Waterford Festival ...Gearoid Lynch - One Of The Greats
We are saddened by the recent death, after a long illness, of Gearóid Lynch, a great chef and co-owner, with his wife Tara, of the delightf ...Cookery Feature - Loaf Tin Bakes
In this time of apartment living and shortage of storage space, coming up with a book of recipes that covers a wide range of options but only need ...Cookery Feature - The Irish Food Writers' Guil ...
Going strong since 1993, The Irish Food Writers' Guild Food Awards were established with a simple aim: to celebrate indigenous Irish food products ...Cookery Feature - Beans, Beautiful Beans
Chef Ali Honour's lovely little book all about beans hit the shelves at the end of January and it couldn’t be more welcome. Having earned he ...Remembering John Howard
Coming from a farming family in West Clare, John Howard would have had that down to earth grounding in his DNA. For many years he has been in our ...Cookery Feature - Gorgeous Brown Bread & H ...
It’s coming up to lunch time as I write this on a cold and blustery January day, and I can’t think of anything better as a reward than ...Cookery Feature - Cookbooks for Christmas
Online information may be the order of the day for many things, but when it comes to cooking nothing beats a book...What A Lovely Lunch!
Georgina Campbell gives a hearty shout-out to the team who created a memorable meal for our recent Irish Food and Hospitality Awards – care ...Articles
-
Cookery & Artisan Foods - Inspired by BLOOM
The June bank holiday weekend had plenty going for it this year – not least the sunshine – and Bord Bia Bloom celebrated its 20th year ...Cookery & Food Tourism Feature - Waterford Fest ...
Now well established as a major player in Irish food and tourism, Waterford was blessed with fine weather recently for the 17th Waterford Festival ...Apps and Books
-
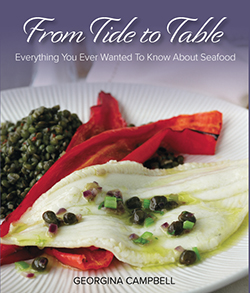
From Tide to Table by Georgina Campbell
Paperback edition of From Tide to Table - Everything You Ever Wanted To Know About Buying, Preparing & Cooking Fish and Seafood by Georgina Campbell
There are currently no comments
Leave a comment
Not a member? Register for your free membership now!
Or leave a comment by logging in with: