
Our travels around the country this year have been brilliant so far, thanks to the exceptional weather and – envisaging it from a visitor&rs ...
Cookery Feature - Wasted


With concern for sustainability gearing up at an unprecedented rate, reducing waste will have topped many a New Year resolutions list this year – and, with reducing food waste in particular identified as one of the top three climate solutions, that’s an area especially worth focusing on, as we can all help to do something about it in our everyday lives.
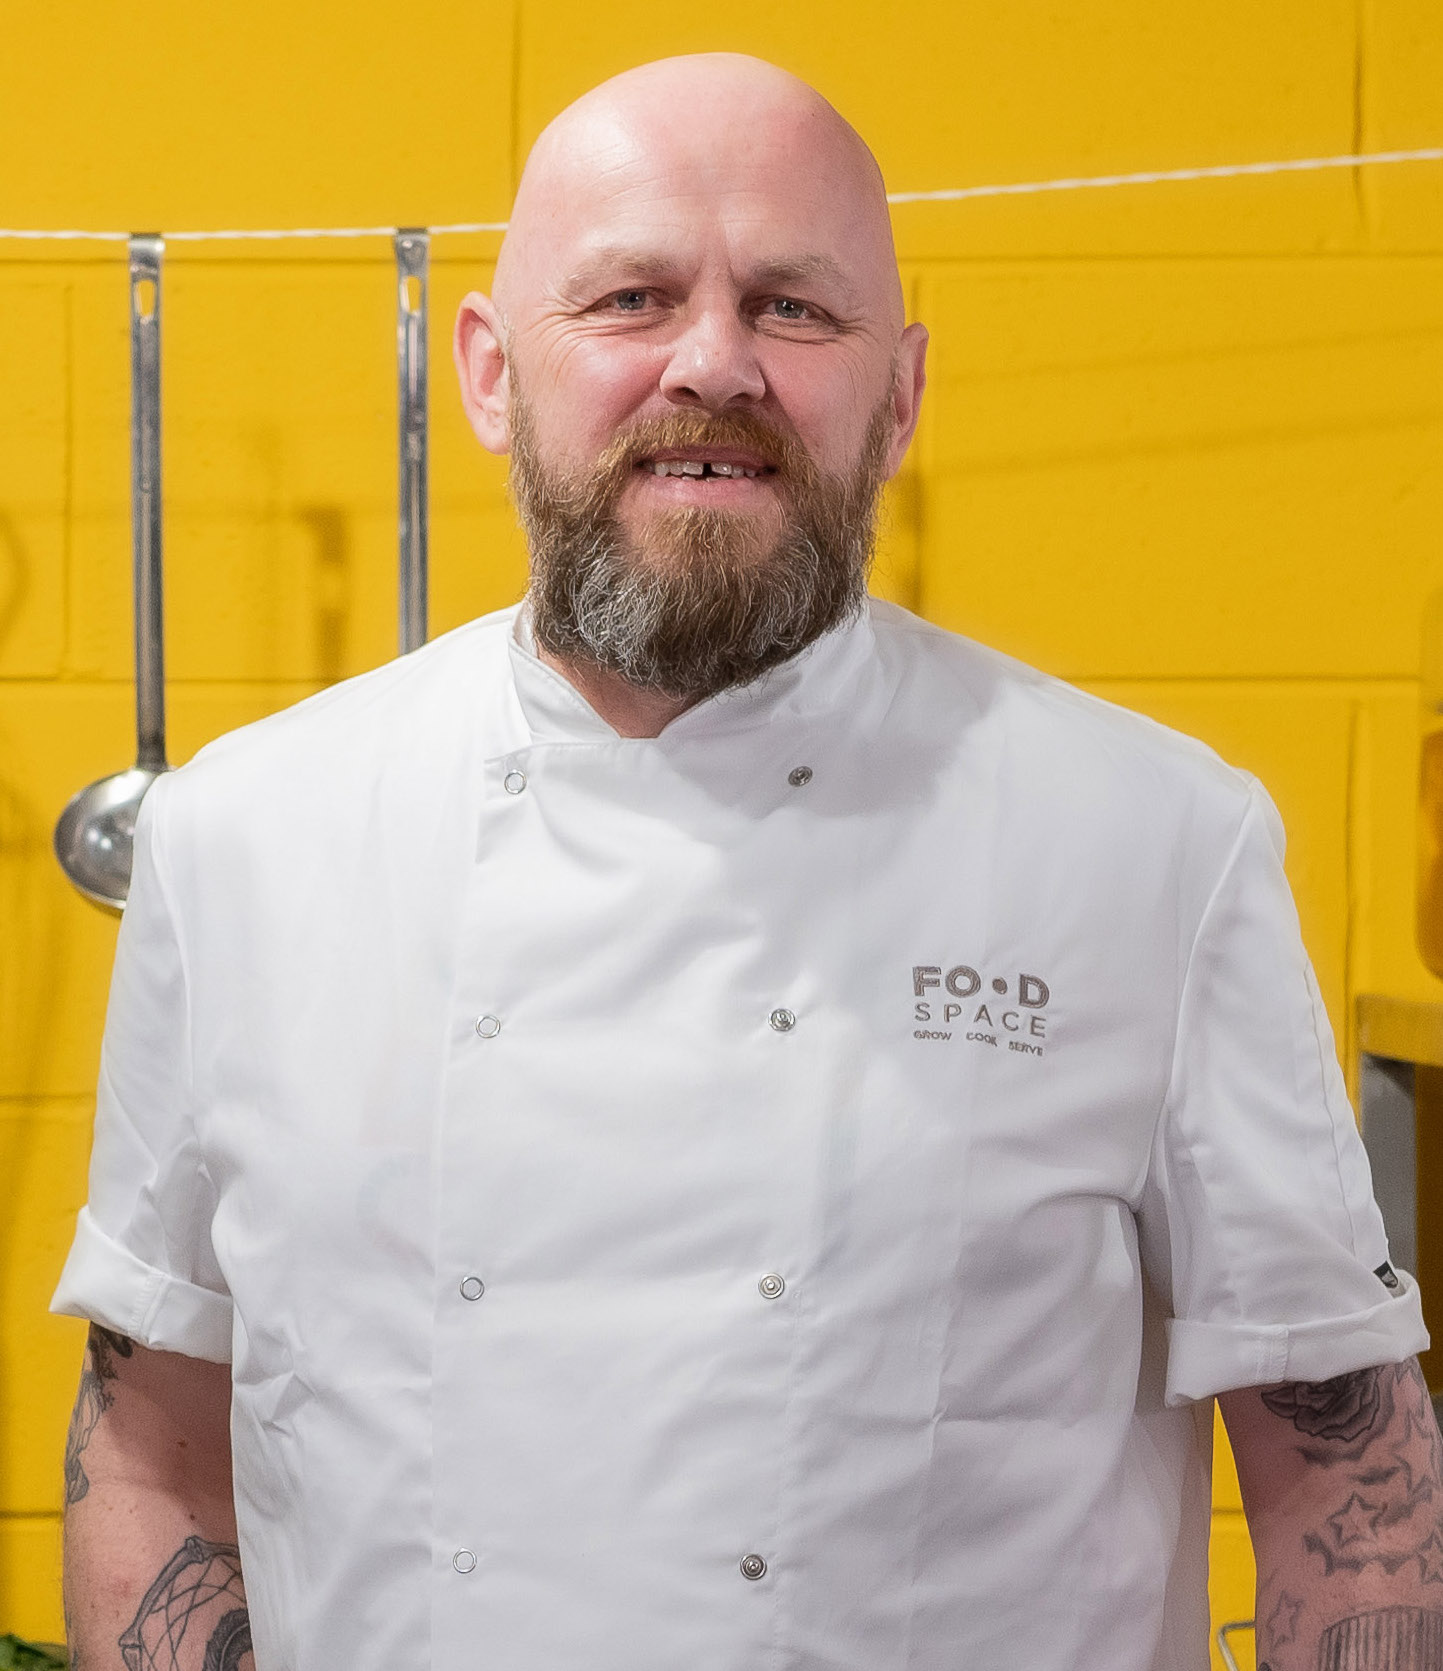 Renowned for his deliciously practical locally-focused and mainly plant-based work on waste reduction - with, amongst many other entities, FoodSpace, GIY and The Chefs’ Manifesto - nobody knows better than chef Conor Spacey (‘Author, Misfit, Disruptor’ according to his Instagram profile) how to help us all to prevent food waste and save money by improving our efficiency in multiple ways – notably by shopping/sourcing more carefully, storing food better and being more imaginative about how we use it every day, whether in professional kitchens or at home.
So the arrival last year of his cookbook, WASTED (Blasta Books hardback, €15 https://blastabooks.com/products/blasta-books-7-wasted and bookshops/speciality food shops) was a seriously important moment in our journey towards sustainability – and all the more so because it is presented with such a light touch. And, with the emphasis on deliciousness rather than do-goodery, Blasta Books summarise it perfectly: “WASTED is a capsule collection of recipes that have come from identifying some of the most wasted food items in our homes. This book will help you to stop wasting food and turn perfectly good ingredients into delicious dishes. And the key word here is delicious. The book's ulterior motive may be to get us to think differently about ingredients and waste, but the driver for all these plant-based recipes is flavour. Wasted will change your mindset and reconnect you to real food, from the root to the tip.”
 From the engaging introduction where we hear about a young Irish lad’s introduction to finding work and living in London - and his growing fascination with the restaurant industry and the amount of waste it entails - it’s an approachable and very persuasive book, combining a natural understanding of the home kitchen with the orderly hands-on practicality of the professional chef. There’s advice a-plenty on everything from Storage (‘How you store your food can lead to waste before you even get a chance to eat or cook with the ingredients you’ve bought’) to How to Regrow Food (something which has fascinated me for some time) and a number of ‘Five Ways With…’sections, on stale bread, whey, broccoli stalks, fermentation and cheese, along with loads of very do-able recipes based on the premise that “…waste is not, and should never be, an option”.
So, we meet the ‘Closed loop recipe’: “This where you really start to think about everything: every ingredient, every vegetable, every part… These three recipes are an example of how to identify every part and incorporate them into fantastic dishes. Throughout WASTED, you’ll also find that parts of one dish lead to another dish:
• Roasted carrots with carrot skin dukkah, carrot top pesto and labneh (see recipe below)
• Pumpkin noodles with roasted pumpkin seeds and pumpkin skin lardons
• Salt-baked beetroot and leaf salad with goat cheese & pickled beet stalk
RECIPES TO TRY (NB: The book is vegetarian but meat, fish or poultry can be added to many of the recipes.)
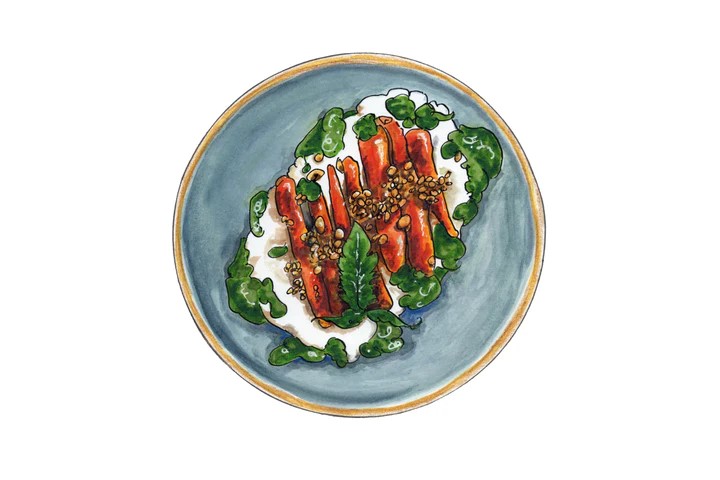 ROASTED CARROTS WITH CARROT SKIN DUKKAH, CARROT TOP PESTO AND LABNEH
I love to work with just one or two ingredients, and this dish is one of my favourites – so much so that it inspired the cover of this book. I like to think of vegetables the same way you would if it was piece of meat: butcher it into parts and ensure you use everything. This dish is a great example of that. More and more supermarkets are starting to sell bunches of whole carrots, including their tops. This gives you more for your money, as the tops are delicious in salads, pasta or turned into pesto. This dish works well as a light lunch or served family-style on a platter as a side for dinner. Serves 2 as a main or 4 as a side.
1 bunch of carrots with the tops still on
a drizzle of rapeseed oil
fine sea salt and freshly ground black pepper
FOR THE CARROT SKIN DUKKAH:
50g nuts (use any nuts that you have – a great way to use up the ends of packets)
1 tbsp cumin seeds
1 tbsp coriander seeds
1 tbsp fennel seeds
1 tbsp sesame seeds
FOR THE CARROT TOP PESTO:
4 spring onions
1 garlic clove, peeled and left whole
1 small bunch of fresh mint or basil, leaves picked
50g nuts (any kind)
½ lemon, zest and juice
3 tbsp rapeseed oil
FOR THE LABNEH:
400g natural yogurt (I love Velvet Cloud sheep milk yogurt)
¼ tsp fine sea salt
First, make the labneh (allow up to 48 hours). Stir the yogurt and salt together, then put a clean piece of cheesecloth or muslin into a strainer and set this over a bowl. Pour in the yogurt and tie the cloth into a knot. Put the bowl in the fridge for 24–48 hours, depending on how thick you like your labneh. I usually give it 48 hours so that it has a cheese-like consistency. Scrape the labneh out into an airtight container and store it in the fridge for up to three weeks. (Don’t throw away the whey that has drained out of the yogurt! Use it to make the Whey hey hey bread.)
To make the pesto, cut the tops off the bunch of carrots. Remove the thick stalks from the leafy carrot tops and chop them separately. Bring a pot of salted water to the boil. Have a bowl of iced water ready. Once the water is boiling, add the carrot tops and chopped stems and cook for 3 minutes, until bright green and tender. Drain, then immediately transfer the carrot tops and stems to the bowl of iced water to stop the cooking process and keep the vibrant colour.
Remove the carrot tops and stems from the cold water, squeeze out any excess liquid and spread them out on a chopping board to dry slightly.
Put the spring onions, garlic, fresh herbs, nuts and the lemon zest and juice into a food processor and blend to a chunky paste. Add the rapeseed oil a little at a time until it’s all combined. Season to taste with salt and pepper. Store the pesto in a sealed jar in the fridge for up to four weeks. It will separate slightly and naturally form a layer of oil on top, so just give it a stir before using.
To make the dukkah, preheat the oven to 140°C (120°C fan).
Peel the carrots, then spread out the skins on a baking tray (you should probably have around 20g of carrot skins). Cook in the preheated oven for 30 minutes, turning twice during the cooking time, until the skins are dried and crisp. Allow to cool completely – the skins will crisp up even more as they cool – then put the dried skins in a blender and blitz on a high speed until they’re all finely chopped. Tip out into a bowl and set aside.
Increase the oven temperature to 200°C (180°C fan).
Mix the nuts and seeds together in a bowl, then spread them out on another baking tray and cook for 8–10 minutes, until nicely toasted. Allow to cool completely, then transfer to the blender and pulse two or three times – you want them to be chopped but not smooth.
Tip out into the bowl with the carrot skins and stir everything together with a wooden spoon. You can store the dukkah in a sealed container for up to four weeks at this point.
Increase the oven temperature again, this time to 210°C (190°C fan).
If you’re using small or baby carrots, you can leave them whole. If you’re using larger carrots, cut them at an angle so that they’re the size of your finger. Put the carrots in a bowl, drizzle with rapeseed oil and season with salt and pepper. Toss to coat them well, then spread them out on a baking tray and roast in the oven for 15 minutes, until they start to colour and still have a slight bite.
To serve, roll the roasted carrots in some of the dukkah. Put them on a serving plate with a big spoonful of labneh on top, then drizzle over some of the pesto.
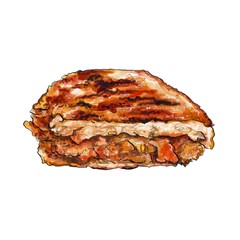 CHEESY KIMCHI TOASTIE WITH BLOODY MARY MAYO
This is my ultimate quick and easy brunch, lunch (I’m never sure what the difference is) or hangover cure. Of course, that’s assuming that you’re organised and have the components already made and ready to go as part of your no-waste kitchen. I haven’t reinvented the wheel here – this recipe is based on the classic Welsh rarebit. It was one of the first dishes I learned as a commis chef many moons ago in London. As for the mayo, there is no vodka in it, but it does have the same spicy kick as a great Bloody Mary. Depending on your mood or how bad your hangover is, you can use your favourite shop-bought mayo or you can make it from scratch in minutes.
With your jar of kimchi and your cheesy bits already at hand, you just need to head out to your local bakery for a fresh loaf of sourdough – and a strong coffee for the trip back. The rest is simple. Makes 1
120ml Guinness or milk
25g butter, plus extra softened butter for spreading
25g plain flour
140g cheese ends (you can use any odds and ends here – I normally have a mix of soft and hard cheeses), roughly chopped or grated
1 tbsp Worcestershire sauce
1 tsp prepared English mustard
1 egg yolk
2 thick slices of sourdough bread
a little kimchi, chopped so it’s not too chunky
FOR THE BLOODY MARY MAYO:
2 egg yolks (freeze the whites for another use)
1 tsp English mustard
a pinch of fine sea salt
500ml rapeseed oil (or any neutral oil)
1–2 tbsp white wine vinegar
juice of ½ lemon
brine from your jar of kimchi
First, make the mayo. If you’re making it from scratch (or see the intro), using a stand mixer, blender or hand blender, whisk the egg yolks until creamy, then whisk in the mustard and salt. Very slowly – literally drop by drop – add half of the oil while continuously whisking or blending until thickened. Whisk in 1 tablespoon of vinegar to loosen the mixture slightly and give it a paler colour. Continue to add the remaining oil in a slow, steady stream, still whisking continuously. Season with another pinch of salt, a squeeze of lemon juice and another tablespoon of vinegar if needed. You now have a basic plain mayo that you can store in a sterilised jar in the fridge for up to one week. To make it into a Bloody Mary mayo, simply stir in some of the fantastic brine from the jar of kimchi. My ratio is two spoons of mayo to one spoon of kimchi brine.
To make the toasties, get two small saucepans. Put the Guinness or milk in one pan and slowly warm it over a medium heat.
Melt the butter in the second saucepan, then add the flour, stir to combine and cook for about 1 minute. Gradually whisk in the warm Guinness or milk to create a smooth sauce, then add your cheese mixture. Stir with a wooden spoon until all the cheese has completely melted and you have a thick paste, then stir in the Worcestershire sauce and mustard until evenly combined. Take the pan off the heat and allow to cool slightly, then stir in the egg yolk. (You can keep this in a covered tub in your fridge at this point, ready to go for a snack of cheese on toast.)
Now it’s time to bring it all together. I love copious amounts of mayo spread evenly over one side of each slice of bread, then the cheesy spread, then the kimchi. Sandwich it together, then spread some softened butter on the outside of both pieces of bread.
Put the sandwich in a warm frying pan over a medium heat (or you can use a sandwich toaster) and gently toast until the bread is golden, then carefully turn it over and toast the other side. Reduce the heat and cook each side for 1–2 minutes longer, until the centre is warm. Dig in with a strong coffee, a lunch cocktail or a good beer to set yourself up for the rest of the day.
From Blasta Books 7: WASTED by @spacey_chef
Illustration by @nickyhooper
By same author
-
Cookery Feature - Foxford Favourites
Cookery & Artisan Foods - Inspired by BLOOM
The June bank holiday weekend had plenty going for it this year – not least the sunshine – and Bord Bia Bloom celebrated its 20th year ...Cookery & Food Tourism Feature - Waterford ...
Now well established as a major player in Irish food and tourism, Waterford was blessed with fine weather recently for the 17th Waterford Festival ...Gearoid Lynch - One Of The Greats
We are saddened by the recent death, after a long illness, of Gearóid Lynch, a great chef and co-owner, with his wife Tara, of the delightf ...Cookery Feature - Loaf Tin Bakes
In this time of apartment living and shortage of storage space, coming up with a book of recipes that covers a wide range of options but only need ...Cookery Feature - The Irish Food Writers' Guil ...
Going strong since 1993, The Irish Food Writers' Guild Food Awards were established with a simple aim: to celebrate indigenous Irish food products ...Cookery Feature - Beans, Beautiful Beans
Chef Ali Honour's lovely little book all about beans hit the shelves at the end of January and it couldn’t be more welcome. Having earned he ...Remembering John Howard
Coming from a farming family in West Clare, John Howard would have had that down to earth grounding in his DNA. For many years he has been in our ...Cookery Feature - Gorgeous Brown Bread & H ...
It’s coming up to lunch time as I write this on a cold and blustery January day, and I can’t think of anything better as a reward than ...Cookery Feature - Cookbooks for Christmas
Online information may be the order of the day for many things, but when it comes to cooking nothing beats a book...Articles
-
Cookery & Artisan Foods - Inspired by BLOOM
The June bank holiday weekend had plenty going for it this year – not least the sunshine – and Bord Bia Bloom celebrated its 20th year ...Cookery & Food Tourism Feature - Waterford Fest ...
Now well established as a major player in Irish food and tourism, Waterford was blessed with fine weather recently for the 17th Waterford Festival ...Apps and Books
-
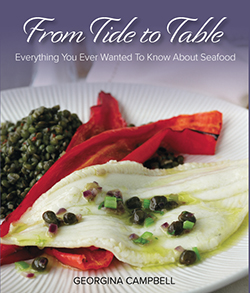
From Tide to Table by Georgina Campbell
Paperback edition of From Tide to Table - Everything You Ever Wanted To Know About Buying, Preparing & Cooking Fish and Seafood by Georgina Campbell
There are currently no comments
Leave a comment
Not a member? Register for your free membership now!
Or leave a comment by logging in with: