
100,000 Children set to Grow their own Food this year with GIY & SuperValu’s ‘Let’s GROW’ Initiative
Grow It Yourself - November


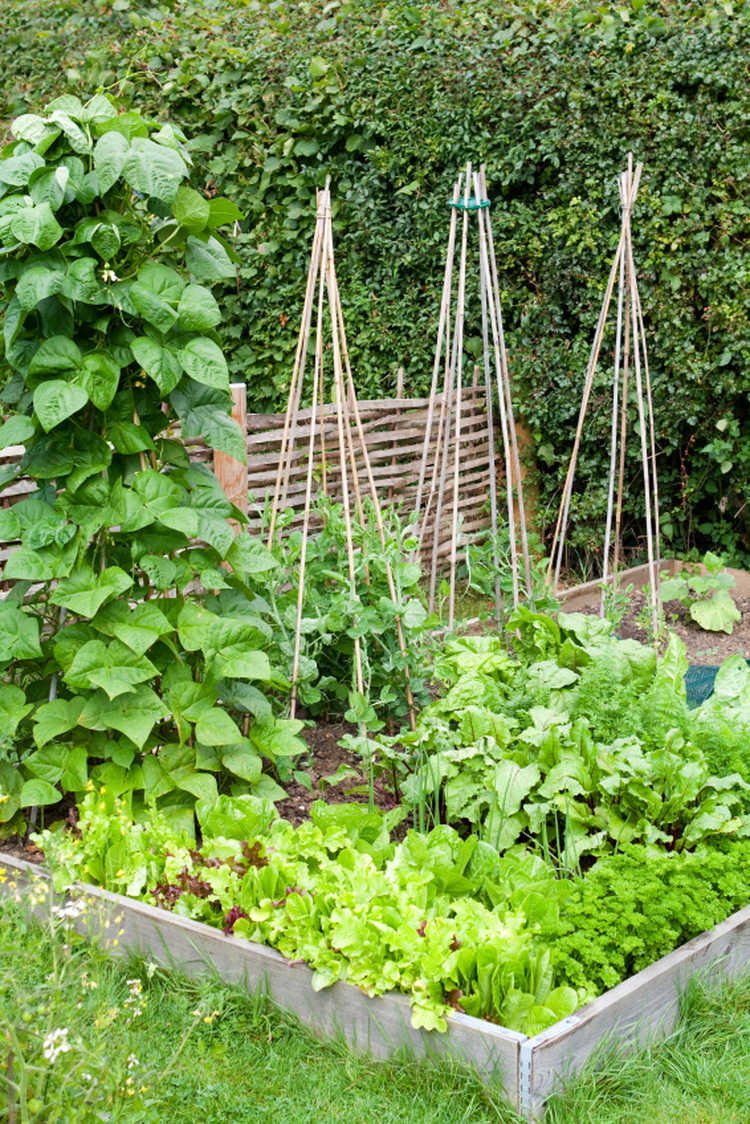
Over the last few years I’ve noticed a definite snootiness about using raised beds for growing food, which I find ridiculous. It’s almost like if you are not out there double digging your soil and breaking your back to suffer for your vegetables then it’s considered cheating. Personally I am all for the occasional cheat if it helps me to grow better veggies or helps me to grow them with less time and effort expended.
Generally speaking you need a good spade’s depth of quality top soil in order to grow good veggies. Unfortunately GIYers now face twin barriers to this approach – poor soil depth/quality in their garden, and lack of time to spend improving the soil quality. In most housing estates in Ireland for example the ‘soil’ was created by departing builders throwing a miserly inch-thick layer of top soil on top of the builder’s rubble – not the most promising growing medium.
A “raised bed” is created by adding a good layer (at least a foot) of soil on top of the existing soil, usually using a frame of timber to keep the soil in place. Instead of digging down in to the soil therefore, you are effectively raising the level of it up by a foot.
The raised bed is therefore an ingenious cheat to provide, good quality, deep, fertile soil that’s perfect for planting. It goes without saying that if you are blessed with good quality, deep soil in your garden and plenty of time for digging, then you don’t need raised beds. But if you don’t, by bringing good quality soil in to raised beds in your garden, you can start growing promising veggies instantly.
They have a number of other benefits. Typically, you don’t ever stand on the soil which means less soil compaction and therefore better drainage (the soil will dry out quicker). They also tend to extend the growing season because the soil in raised beds warms up earlier than the soil around it. You can therefore start planting earlier in the season. The dreaded slugs tend to be less of an issue too because they face more barriers to get in to the bed.
When it comes to the shape and look of your raised beds you can let your imagination run riot, but don’t sacrifice functionality for aesthetics. I went nuts a few years back making triangular-shaped beds – they looked lovely but were highly impractical.
The important thing to remember is that you are not supposed to be walking on the soil at any point, so you must be able to reach in to the centre of the bed from the sides. A 4ft (1.2m) wide bed is therefore considered ideal because the centre of the bed can be reached from both sides (depending how long your arms are I guess!).
The beds should be a minimum of 25cm deep. You can go deeper if you want (even up to waist height) - deeper beds have the advantage of being easier to work at (no stooping etc) but they drain very quickly and are therefore difficult to keep watered in summer. You also need a serious load of soil to fill them.
A typical argument against raised beds is their cost. In reality you can spend as much or as little as you want. You can buy raised beds or make them yourself from old scaffolding planks or salvaged timber.
The Basics – 5 Step Plan to Make Raised Beds
A simple 5-step plan to put raised beds on to a lawn is as follows:
1. Measure out the lengths of wood needed, cut them to size and nail them together.
2. Support from the inside using wooden pegs, then nail the planks to the pegs for support.
3. Place a thick layer of wet cardboard or newspaper at the bottom to kill off grass and weeds.
4. Fill with alternating layers of manure/compost and top soil. A mix of about 60 per cent soil and 40 per cent compost would be ideal.
5. Fill the beds to within about 10cm of the top so that the sides of the bed act as a windbreak.
Autumn is a great time to put in raised beds. If you get them built in the autumn and early winter and filled with soil and compost, you can cover them down for the rest of the winter so that they will be bursting with nutrients and ready for planting next spring.
You can buy top soil in garden centres but it will be expensive. Specialist soil mix providers like Enrich sell larger quantities (1-tonne bags). Ask at your local GIY group, gardening club, or allotment organisation. Failing that, keep an eye on local papers. Ask to see the soil before it’s delivered - you do not want a lorry load of subsoil full of stones and weeds.
GROW HQ
We were very proud to win the Farm & Sea to Plate Award at the 2017 Food & Wine Awards. Check out the courses, classes, events and more at the home of the GIY movement, GROW HQ, in Waterford city. In addition to our 65-seat home-grown food café and shop, we’ve a range of growing and cooking courses happening weekly – for courses and events happening this month, check out www.growhq.org
Things to do this Month – November
To Do
Do not leave beds bare for the winter – sow a green manure, or cover with a thick layer of manure/compost and then black plastic or straw. This will return nutrients to the soil, keep the worst of the weather off it, suppress weeds and prevent leaching of nutrients. ‘Earth up’ or tie up vegetables such as cabbage, cauliflower and Brussels sprouts. Divide up your rhubarb if you want to propagate, and cover it with a thick mulch of manure. Prune apple trees. Mulch fruit bushes. Take cuttings of currant bushes from current season’s wood.
Sow
Sow broad beans outside now for an early crop next spring. To avoid rotting before germination, make small newspaper cups and germinate them indoors first. Next summer’s garlic does best if it’s planted before Christmas – plant outdoors in well prepared soil in a sunny spot. Though I have to admit I never bother with them, some varieties of onion can over-winter and will be ready to harvest in early summer.
Harvest
Continue to harvest perpetual spinach, cabbage, cauliflower, potatoes, swede, parsnips, apples, pears. Start harvesting leeks, winter cabbage, kale, artichokes, Brussels sprouts. Time to lift carrots and turnips or at least cover them with a good layer of straw to protect them from frost damage.
Recipe of the Month – Mick’s Wilted Spinach, Black Pudding and Poached Egg Breakfast
I get a lot of slagging here in GIY about my love of breakfast, and I am loathe to add fuel to that particular fire. But, it is without question my favourite meal of the day, and I’ll get up early just to ensure I have enough time to cook it.
This breakfast is packed with iron and protein in the form of fresh-blood black pudding, eggs and spinach. Though black pudding is a rich and easily absorbed source of iron, it’s on the fatty side – so you could perhaps leave it out mid-week and enjoy at the weekend. Always seek out a good quality pudding made from fresh blood as opposed to blood ‘powder’.
A good black pudding really should have only a small handful of ingredients: blood, pork fat and meat, rice, oatmeal and seasoning. Inch House is an artisan black pudding made by Nora Ryan from Inch House in Thurles that we use on the breakfast menu at GROW HQ.
It’s available from good retailers including Ardkeen in Waterford, Cavistons in Dublin and Country Choice in Nenagh. Jane Russell also recently introduced an excellent fresh blood black pudding to her product range.
Serves 4.
Ingredients:
• 6-7 large spinach leaves – stalks finely chopped, and leaves chopped
• Grated nutmeg
• Sea salt and pepper
• 4 x 1cm slices of good quality black pudding
• 1 beef tomato – cut in to slices
• 4 organic eggs
• 4 slices of sourdough bread
Directions:
Fry a little butter in a pan on a low heat and add the spinach stalks. Wilt gently until soft and then stack them in the corner of the pan. Add the slices of black pudding and fry for a few minutes on each side until browned and cooked through. Remove them and the spinach stalks to an oven to keep warm. Fry the slices of tomato for a minute or so on each side to brown slightly and then remove from the pan.
Meanwhile bring a saucepan of water to a rolling boil. Crack the eggs in and poach them as you like them. Pop some sourdough bread in the toaster. Back to the frying pan - add the spinach leaves. Season well with some sea salt and black pepper and grate a little fresh nutmeg on top. Keep turning the spinach in the pan - you want it to wilt gently as opposed to frying so add a little knob of butter or a few drops of water if you need to.
When the spinach is wilted it’s time to plate up – butter a slice of sourdough toast and them make a stack on top: a slice of black pudding, tomato, spinach stalks and leaves and top with a poached egg. Eat, then embrace the day.
Become a VIPea
By joining GIY you help us to continue the work of supporting people just like you to grow food at home, at school, in the workplace and in the community – this year we will support over 500,000 people and 9,000 community food growing groups and projects. It costs just €35 to join GIY for a year, and to say thanks we will send you a seasonal copy of our supporter’s magazine GROW and some GIY seeds for you to sow each quarter. It will also entitle you to a 10% discount at GROW HQ and our online shop. Join today at www.GIY.ie.
About GIY

GIY is a not-for-profit organisation that aims to create a healthier, more sustainable world where people grow their own food. We inspire and support people to grow food more successfully by bringing them together to share advice, tips and ideas. There are approximately 65,000 people involved in the GIY movement in Ireland, which is proudly supported by Woodies DIY.
For more information check out www.giyireland.com
Michael Kelly is a freelance journalist, author and founder of GIY Ireland.
© GIY Ireland 2017 – all rights reserved.
By same author
-
Grow It Yourself
GIY Market Garden at Curraghmore Estate
Seriously exciting news from the multi-award winning social enterprise GIY (Grow It Yourself) this month, on their expansion to develop a GIY Mark ...GIY's 'Get Ireland Growing Day' - Doing our b ...
Mick Kelly and the wise folk at GIY are urging every household in Ireland to 'sow a seed and Get Ireland Growing’ to mark the longest day of ...GIY - GROW At School FUND RAISING
Grow It Yourself (GIY) calls on businesses and well-wishers to back an important €1 million initiative for children to GROW At SchoolGIY - A Future for Irish Vegetables?
There’s a vegetable shortage crisis, yet Irish vegetable growers are going out of business – what’s going on?GIY - The Colder Months
GIY founder Mick Kelly has plenty of ideas to keep us all busy and well fed all yearGIY - 'Get Ireland Growing Day’ 2022
Join in 'Get Ireland Growing Day’ 2022 urges GIY Ireland founder, Mick Kelly - projects like seed exchanges, pollinator walks and foraging w ...GIY - Dig For Dinner
There may not be too many people around who remember the Dig For Victory campaign in WW2, but the importance of food security has taken on a new u ...GIY - How to have a more Sustainable Christmas
GIY founder and ‘Green Guru’ Mick Kelly has plenty of ideas on How to have a more Sustainable ChristmasGIY - Autumn Jobs & Delicious Eats
GIY founder Mick Kelly has plenty of ideas to keep us all busy and well fed this autumn and next yearArticles
-
Cookery & Artisan Foods - Inspired by BLOOM
The June bank holiday weekend had plenty going for it this year – not least the sunshine – and Bord Bia Bloom celebrated its 20th year ...Cookery & Food Tourism Feature - Waterford Fest ...
Now well established as a major player in Irish food and tourism, Waterford was blessed with fine weather recently for the 17th Waterford Festival ...Apps and Books
-
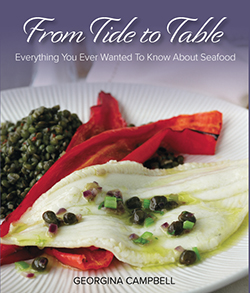
From Tide to Table by Georgina Campbell
Paperback edition of From Tide to Table - Everything You Ever Wanted To Know About Buying, Preparing & Cooking Fish and Seafood by Georgina Campbell
There are currently no comments
Leave a comment
Not a member? Register for your free membership now!
Or leave a comment by logging in with: